Nuove Vele, Dreamer Pronto !!! New sails Dreamer is ready to go!

Ciao,
Dreamer ora si trova nel suo ambiente naturale… l’acqua salata. giovedi 12 Aprile abbiamo l’abbiamo rimessa in acqua. Manca solo la pulizia della coperta che faro’ questa settimana.
Ecco a voi le foto con le vele nuove… Perfette!! Grazie a Roberto e Gianni della ULLMAN SAIL che hanno lavorato in maniera sublime.

Hello,
Dreamer is now in its natural environment … salt water. Thursday April 12 we we put in the water. Only one thing is missing …. cleaning the deck!
Here’s photos with the new US sails … Perfect! Thanks to Roberto, and Gianni of ULLMAN  SAIL who have worked in a sublime way.


Nuovo serbatoio per il diesel – New diesel Tank

Ciao a tutti… come promesso ecco le foto del nuovo serbatoio del carburante. Leggermente piu’ grande ma con la stessa circonferenza e sopratutto con il livello del carburante.Finalmente vedro’ visivamente la “riserva”. Costruito in acciaio e colorato a caldo, un ottimo lavoro eseguito a regola d’arte regalatomi da  Enrico il proprietario delle Industrie Scardellato ! Grazie Enrico!!!

Hello… as promised.. here are the pictures of the new fuel tank. Slightly more big but with the same circumference and especially with  fuel level. Finally I will  see how much fuel I got in the tank without mentally calculation speed/hour. It is  made by steel  and oven colored. A great job well done! It is a present from Enrico, the owner of Industries Scardellato! Thanks Enrico!

Brutto tempo…bene rinforziamo Dreamer! Bad weather.. I make Dreamer more strong!

Visto il tempo che purtroppo non ci da tregua e nell’attesa di rimettere Dreamer in acqua, ho deciso di ri-smontare le corsie di teak dove scorrono le protezioni del tambucio e le maniglie. Con gli anni..circa 30..il teak delle corsie del tambucio si era ormai ridotto in maniera preoccupante non garantendo piu’ una sicura tenuta.
Grazie A Piero..il mio mentore in fatto di teak e lavori sul legno, abbiamo ricostruito  i due pezzi, tali e quali, ma molto piu’ robusti e sopratutto piu’ affidabili.
Pensate che  i tientibene erano inseriti nel Teak con e due “spine “di legno e un po’ di silicone…. ahi ahi ahi.

The weather unfortunately does not give us the sun and warm.. so waiting to put Dreamer in the water, I decided to disassemble  teak lanesl where the  washboards run included the handrails. Over the years .. about 30 .. the teak lanes of the companionway  had been reduced at an alarming rate not more than ensuring safe washboard “keeping”..in bad weather.
Thanks to Piero .. my mentor guru of teak , we have reconstructed the two pieces, as they are, but much more strong and reliable.
Incredible… that the original handrails were attached to the Teak  with “thorns” of wood and a little silicon …. ouch ouch ouch.Dangerousss!!!

t


Lavori sul timone – Works on the rudder

Ciao… A tutti ecco a Voi i Lavori sul timone!!
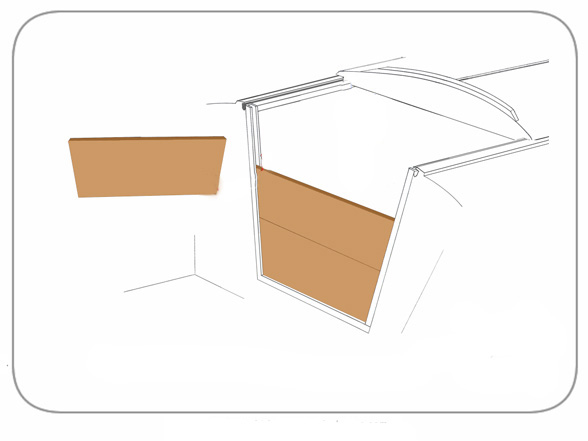
Sto ultimando i lavori sul timone di Dreamer, come potete vedere dalle foto che ho postato ho deciso di irrobustire il timone aumentando la dimensione delle guance d’acciaio che tengono la barra nuova di teak. I fori originali delle viti passanti delle guance permettevano all’acqua di entrare con il rischio di un indebolimento completo della struttura, infatti questo è un problema spesso presente nei timoni dei folkboat  Marieholm, e purtroppo il mio non ne era completamente esente. Per evitare il peggio (dopo aver ben asciugato il timone lasciandolo un paio di mesi dentro il locale caldaia di casa..) ho resinato tutti i fori compresi i 2 nuovi  e  ri-forati.(.. che fatica ..il timone è duro come l’acciaio..e infatti di acciaio dentro ne ha parecchio). ho grattato la vecchia vernice stuccato il tutto e ho dato 2 mani di primer epossidico manca solo dare l’ultima grattata e poi via allo spruzzo con il colore originale… YO!!!!

UN GRAZIE IMMENSO A RAIMONDO E ANDREA DELLA RIBA (specializzata nel taglio laser e lavorazioni  di acciai) che hanno riprodotto esattamente le particolari viti e le placche d’acciaio del timone.Senza il loro supporto e pazienza questa modifica non sarebbe stata possibile. GRAZIE MILLE!!

Hello … To all of you here to the work on the rudder!
I’m finishing work on the Dreamer rudder , as you can see from the pictures I posted, I decided to strengthen the rudder increasing the size of the steel plates  that hold the new tiller made by teak. The original holes in the rudder allow water to enter with the full risk of a weakening of the structure, in fact this is often a problem present in the rudders of folkboat Marieholm, and unfortunately I was not completely free. To avoid the worst (well dried after leaving the helm a couple of months in the boiler room of the house ..) I have resin all the holes including the 2 new and re-drilled. (.. Struggling .. the rudder is hard such as stainless steel inside). I scraped the old paint  and I gave 2 coats of epoxy primer  and rudder willl be ready to be spray with original color. YO!!

A HUGE THANK YOU TO  RAIMONDO AND ANDREA OF  RIBA (specializing in laser cutting and steel) that have exactly reproduced the special screws and steel rudder plates .Without their support and patience this change would not have been possible. THANK YOU VERY MUCH!

Vecchi fori – Old holes

New screw handmade by 316L screw original was bronze.

New Steel plate

Old and New

Andrea Drilling Helm..hard!!!!!

Primer 2 hand…


Lavori di rifiniture – Finishing Works

Ciao! Gennaio è passato e i miei lavori procedono in modo che alla fine di marzo
Dreamer sarà pronta per navigare. Le rifiniture mi piacciono un mondo e sono del parere he stare dentro una bella barca ti rende ancoratutto piu’ bello. Sono un esteta e un purista della perfezione e dove posso cerco di mantenere alto il livello. Dreamer sarà splendente e robustissima!! Ecco a Voi i miei ultimi lavori:

Hello! January has passed and my work is progressing so that at the end of March
Dreamer will be ready to sail. The finishing touches make my very happy and I think make nice inside the boat will be very pleasant to live inside. I’m an purist  perfectionist  and where can I try to maintain a high level standard . Dreamer will be shining and sturdy! Here’s to you my latest works:

Rifiniture – Finish

Procedono i lavori di rifinitura interni e come al solito quando si cambia qualcosa, rimontando bisogna riadattare sempre tutto. Ormai sono abituato, e se prima mi spaventava ora con tranquillità risolvo senza problemi. Ben venga si dice… esperienza insegna! Dreamer aveva uno specchio incollato con bi-adesivo all’interno della porta del bagno, io ho conservato il tutto ma ho aggiunto una nuova cornice in teak ho inoltre sostituito il voltometro precedente con l’originale vecchio voltometro utilizzato dal vecchio proprietario Caspar, in quanto piu’ preciso nell’indicare lo stato di carica delle batterie.
A Voi le foto…:

Hello I’m finishing wood works inside Dremer,  and as usual when you change something, you have to readjust and fix when reassembling everything. Now I’m expert!  And if in the beginning I was scared about it, now with tranquility I solve everything with no problems.
Dreamer originally had a mirror glued with double-sided adhesive inside the door of the bathroom,  now I have kept the whole thing but I’ve added a new frame in teak. I changed also the batteries control system,  re-using the old voltmeter used by old owner Caspar, it is more precise in showing the battery status.  Here the photos:

Old Mirror

New Teak Frame

“New” Voltometer

Un nuovo spazio – A new space

Auguri innanzitutto a tutti i lettori di questo blog. Sperando in un 2013 migliore!!!
Ho interrotto i lavori su Dreamer per le festività natalizie senza pero’ mai smettere di pensare ed escogitare ottimizzazioni per Dreamer (..senza naturalmente stravolgere la sua struttua interna e originale). Ecco a Voi oggi il risultato di queste nuove variazioni.
Oggi 7 gennaio in cantiere ho finito di fissare le viti del mio nuovo “gavone” interno” utile a raccogliere oggetti e altro.
Ho pensato che questa fosse la soluzione migliore, ed  ecco a Voi le foto:

Happy New Year for all readers. Hoping for a better 2013!
I stopped work on Dreamer for the holiday season but I never stop thinking how to optimize the Dreamer’s interior (.. of course without compromising his internal original setup). Here’s to you  the result of these new changes.
Today, January 7 in the boatyard I finished tighten the screws of my new internal “locker” to gather useful items, and more.
I thought this was the best solution, and here’s to you the pictures:

IMG_1471

New Locker

IMG_1472

All closed


IMG_1473

Bed Support

IMG_1474

Bed support


IMG_1475

Sliding door


IMG_1476

Free

IMG_1477

Sliding rail


La mia nuova “prua” – My new “Bow”

Salve a tutti,
ringrazio tutti gli utenti che mi scrivono e mi incoraggiano ad andare avanti a questo progetto. Vi anticipo la modifica che ho fatto al mobilio della prua di Dreamer. E’ stato fatto per chiudere il foro di prua e rendere Dreamer piu’ bello e funzionale! Ciao

Hi all,
I thank all the people who write me and encourage me to move forward with this project.
I anticipate the changes I made to the furniture’s bow of Dreamer. It ‘been done to close the hole and make more beautiful and functional the Dreamer interior.
Cheers


IMG_1431 IMG_1432 IMG_1433

Nuovi grilli in Dyneema – New Dyneema shackles

Per prima cosa un particolare grazie ad Andrea per la donazione paypal!! Grazie Andrea!!!!

Nell’ attesa che arrivino i pezzi di ricambio del rollafiocco Profurl C290 (rovinati durante il trasporto dal Portogallo.. via camion) mi sono controllato tutto lo strallo di prua . Come al solito quando i lavori vengono fatti da incompetenti i danni sono subito evidenti. Il precedente proprietario per Dreamer è stato un disastro… Il rollafiocco montato corto ha fatto in modo che riavvolgendo il genoa  ruotasse anche lo strallo con conseguente sormonto dei trefoli d’acciaio, da quì …  nuovo strallo piu’ resistente e sistemazione di tutto a regola d’arte, alla fine Dreamer sarà pronta e perfettamente sicura per una navigazione d’altura. In questo periodo mi sto’ addentrando nel Rigging seguendo i consigli del mitico Brion Toss e con pazienza  ho imparato a fare i grilli tessili in Dyneema putili e sicuri. Li utilizzerò come attacchi per le scotte del genoa.

Waiting for the arrival of spare parts of furling system Profurl C290 (damaged along the transport by truck from Portugal ..) I checked all the forestay. As usual when jobs are made by incompetent damages are immediately evident. The previous owner was a pain for Dreamer… furling fitted was too short sure that rewinding the genoa also rotate the forestay resulting in overlap of the strands of steel  … So..new forestay more resistant so at the end Dreamer is ready and perfectly safe for offshore sailing. In this time I learned how to do the  textile shackles made Dyneema strong and safe thanks to one of living legend in rigging:  Brion Toss. I will use them to attack the genoa sheets.

Here you are some photos:
Ecco a Voi alcune foto:


Grazie Dorian di Sailshirt.com!! Thanks Dorian of Sailshirt.com!!

Un grazie particolare a Dorian di Sailshirt.com per aver sponsorizzato con le sue bellisime polo l’equipaggio di Dreamer. Ottimi prezzi e servizio veloce!!
Grazie Dorian!!

A special thanks to Dorian of Sailshirt.com for sponsoring Dreamer with its beautiful polo shirt.Great prices big deal and fast service!

Thanks Dorian!

Sailshirt website

Here are some logos to sew on your polo shirt: