Cornici del tambucio..!! Hatch’s frames..!!

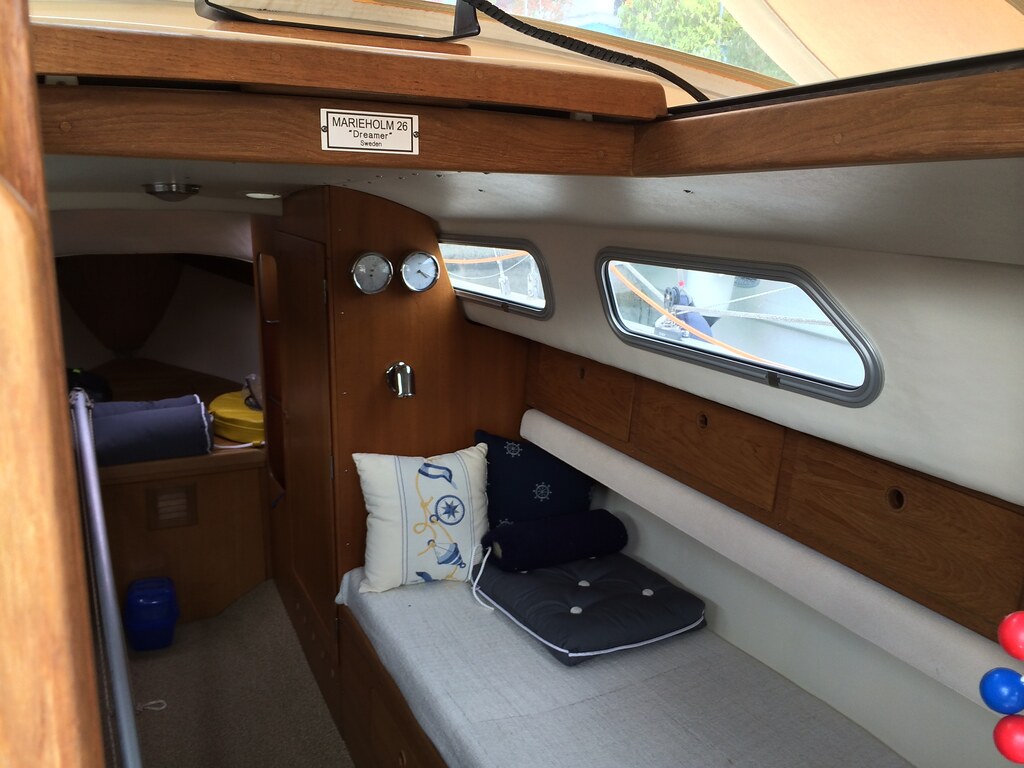
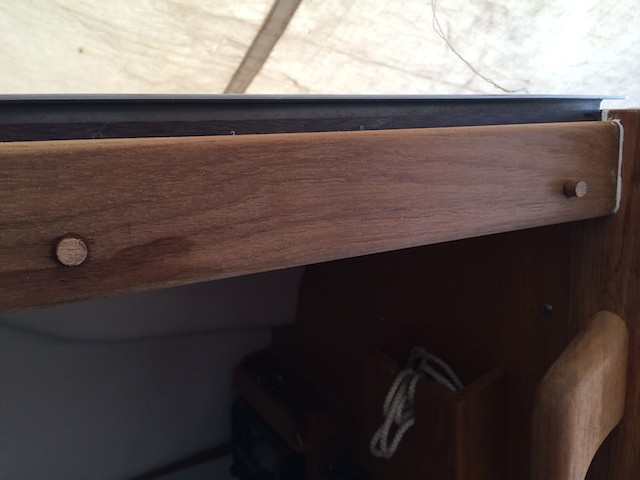
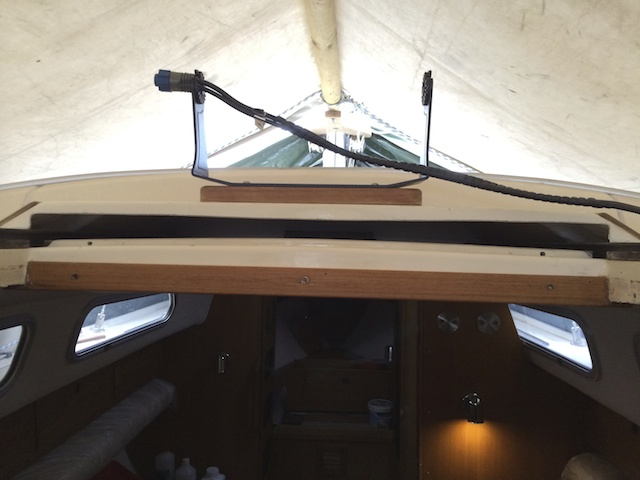
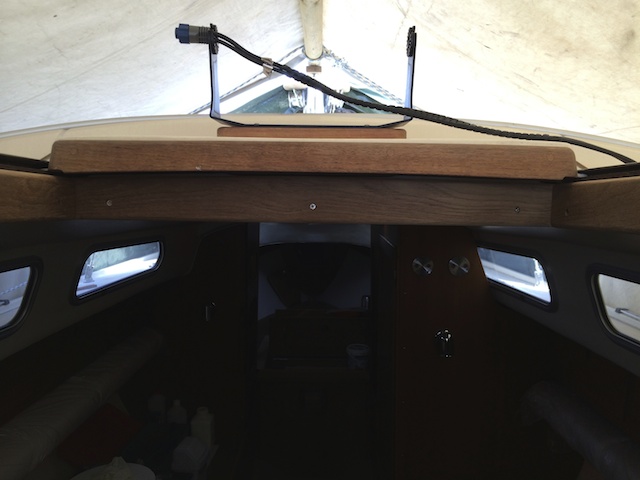
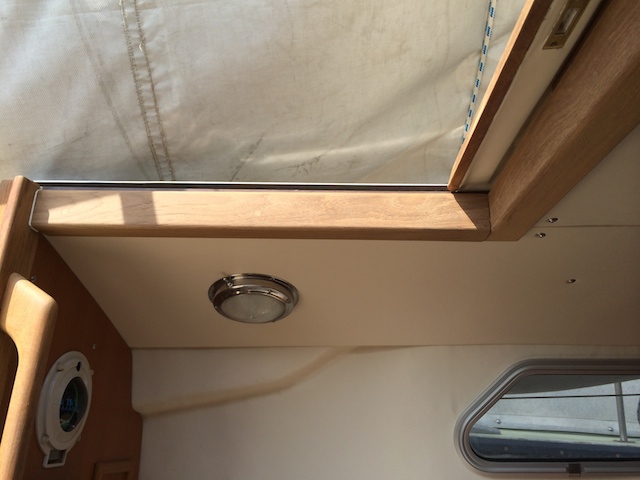
Oggi 31 marzo ho completato le cornici del tambucio. Originariamente di Teak sottili 5mm sono state ricreate assieme a Piero con spessore di 10mm sempre in teak. Tagliate con bordo a vista più’ alto per nascondere  anche la vetroresina originale e creare un senso di calore e.. perfezione che a me piace tanto. Il problema comunque è stato quello di adattare le cornici alla stampata della barca… effettivamente non perfetta…tagli inclinati e tanti aggiustamenti alla fine mi hanno premiato. Ah..dimenticavo, i tappi di teak che coprono le viti sono stati incollati con colla epossidica e allineati alla vena di teak.. March 31 Today I completed the frames of the hatch. Originally Teak thin 5mm have been recreated with Piero with a thickness of 10mm. ù The frames are cut more high to hide the original fiberglass and create a sense of warmth and perfection .. that I like so much. The problem, however, was to adapt to the  frames of the edge of the hatch … actually … not perfect!! Crosscuts and many adjustments I was finally rewarded. Ah .. I forgot, teak plugs that cover the screws were glued with epoxy and aligned to the vein of teak ..

Contropiastra strallo di prua..!! Forestay backing plate..!!

Altro lavoro appena concluso dopo il cambio delle lande di Dreamer.
Ho provveduto a resinare con ulteriori strati di matt / biassiale e resina poliestere
l’interno della prua di Dreamer in modo da livellare la superficie, creando cosi uno spessore di vetroresina pari a 3/4 cm. Le viti della landa lunghe 12 cm si sono rivelate lunghe a sufficienza per poter passare attraverso la vetroresina, i 4 cm di compensato marino di prima qualità (dipinto in bianco con bi-componente bianco e incollato con resina epossidica in modo da creare una superficie di appoggio piatta) e relativa contropiastra in inox 316L dallo spessore di 8mm. Il tutto bloccato con dadi autobloccanti e relativi dadi ciechi. Praticamente indistruttibile e affidabile!!

Other work has just ended after the change of the Dreamer’s fittings. 
I proceeded to potting the inside of the bow  to level the surface, with additional layers of matt / polyester resin and biaxial  thus creating a thickness of fiberglass equal to 3/4 cm. The screws of the bow fittings are 12 cm long proved to be long enough to go through the fiberglass, 4 cm of top quality marine plywood (painted in white with bi-component and glued with epoxy resin in order to create an flat support area) and a 316L stainless steel  backing plate with a thickness of 8mm. Everything bolted with nuts and blind nuts. Virtually indestructible and reliable!

Rinforzo…! Reinforce…!

E stata dura ma alla fine dopo varie  consultazioni inclusa quella di Brion Toss famoso rigger di Seattle ho provveduto a fare un punto di ancoraggio per le lande nella parete destra.
Infatti proprio in questa zona, come più’ di qualcuno mi ha confermato M26 risulta debole e io personalmente  ho notato un leggero sollevamento della coperta..nulla di grave dopo 30 anni di onorato servizio ma per evitare ulteriori problemi ho rinforzato il tutto.
Ho creato un punto di ancoraggio con una landa di 6 mm inox 316 incollata tra due strati di compensato marino avvitata e affogata nella resina epossidica, successivamente incollata alla parete con resina epossidica & fibre minerali, poi ho ricoperto con 6 strati alternati di di matt e stuoia, usando resina epossidica addizionata con fibre minerali.
il risultato e questo.
Il lavoro di di questo ancoraggio e di alleviare il lavoro della coperta.

It was tough but in the end, after various consultations including one come from famous  rigger Brion Toss of Seattle I proceeded to do an anchor point for the chainplate on the starboard side.
In fact, precisely in this area, as most owner I confirmed me, the M26 is weak and I personally have noticed a slight lifting of the deck .. nothing serious after 30 years of honorable service, but to avoid further problems I reinforced everything.
I created an anchor point with a block of marine plywood where was bolted a 6mm 316 stainless all glued to the wall with mineral fiber & epoxy resin. I covered with 6 alternating layers of matt and mat, using epoxy resin added with mineral fibers.
The result is this on the photos.
The work of this anchoring permit less stress to the deck.


Triple AAA…!

Salve ecco a Voi le nuove lande di Dreamer. Disegnate secondo norma e con le giuste proporzioni su indicazione del libro “RIGGING” di Brion Toss e dalle indicazioni fornite dal forum IFBOAT.COM (design delle lande Danesi consigliate ma non a 4 fori..se possibile evito di forare troppo la coperta…) Sono costruite in acciao elettrolucidato 316L e saldate a TIG. Tutto questo grazie ad Andrea di RIBA per il taglio laser e ad Andrea di Istrana per le saldature al TIG. Dreamer sarai una roccia!

Hello to you here is the new chainplates & fitting for Dreamer. Designed according to the standard and with the right proportions on the recommendation of the book “RIGGING” by Brion Toss and from the information provided by the forum IFBOAT.COM (design of the recommended Danish chainplates  but not with 4 holes .. if possible I avoid drill my deck as much as possible!)
They are made of electro-polished 316L steel and TIG welded.
All this thanks to Andrea RIBA laser cutting and Andrea Istrana for TIG welding.
Dreamer will be a rock!


Tambucio a Nuovo..! Hatch as New..!

Tambucio a nuovo…!! Infatti così è stato. Non amavo affatto la sua rifinitura bianca con tutta la superficie visibile irregolare così ho preferito rifare il tutto. Per prima cosa ho deciso di rinforzarlo con un cordolo di stucco epossidico. Successivamente
ho levigato il tutto a dovere stuccato e per finire 2 mani di fondo e 2 di vernice bianca avorio…ah…dimenticavo.. La maniglia di teak così almeno dall’interno di Dreamer riesco ad uscire senza difficoltà!!

Hatch as new …! Indeed it was. I did not like the white finish and his irregular  visible surface. For first  I decided to reinforce it with a bead of epoxy filler. After that I sanded all hatch and at the end I gave 2 coats of primer and 2 coats of paint white ivory … ah … I forgot .. The teak handle, so from inside Dreamer  at least I can go out  without difficulty!