Ecco A voi il lavoro finito!
Here for you the end of the work!


Ecco A voi il lavoro finito!
Here for you the end of the work!
Salve,
finiti i lavori di resinatura ho rimontato tutta la parete tappando i vecchi fori delle viti con cunei di legno e resina epossidica e ri-forato tutto in modo da aver piu’ tenuta delle viti che sorreggono il tutto.
Ho inoltre rifatto in un unico pezzo di teak il supporto reggi schienale adattandolo in maniera decisamente più elegante e precisa dell’originale vecchio di 30 anni e forato come un colapasta. Cambiati inoltre i cavi elettrici dell’albero e sistemato tutte le luci.FATTA!!
Hello, finished to epoxy I remounted whole wall plugging the old screw holes with wooden wedges and epoxy and re – drilled everything so the screwhave held more all stuff . I remade also, into a single piece of teak, the back support adapting it, more elegant than the the original 30 year old drilled like an colander!! Changed also all the electric cables inside the mast and fixed everything!! DO IT!!!!
Ciao a tutti!
nonstante abbia messo in vendita Dreamer i lavori continuano, questo per migliorare ed ottimizzare gli spazi in questa bellissima barca.
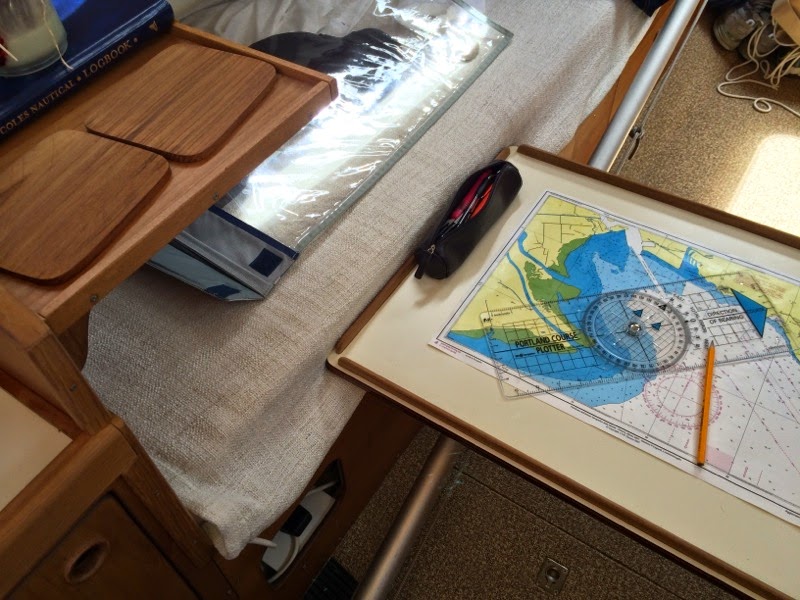
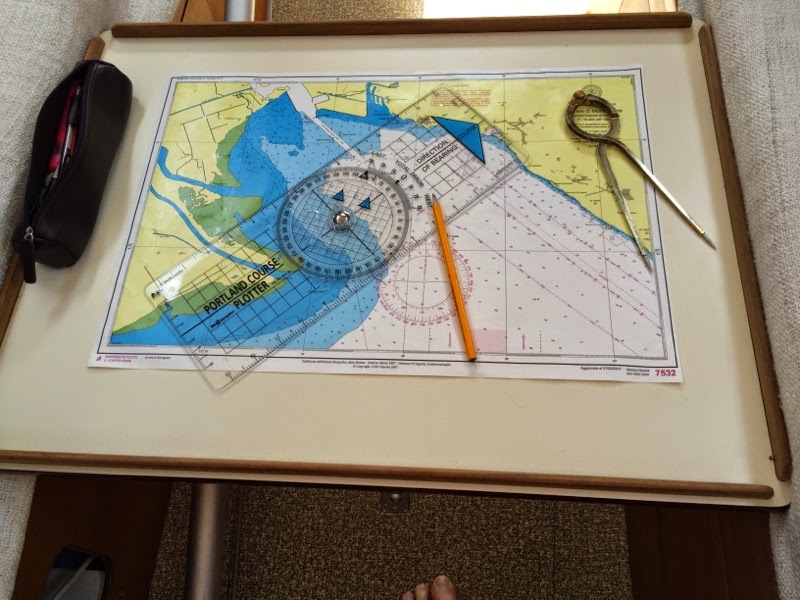
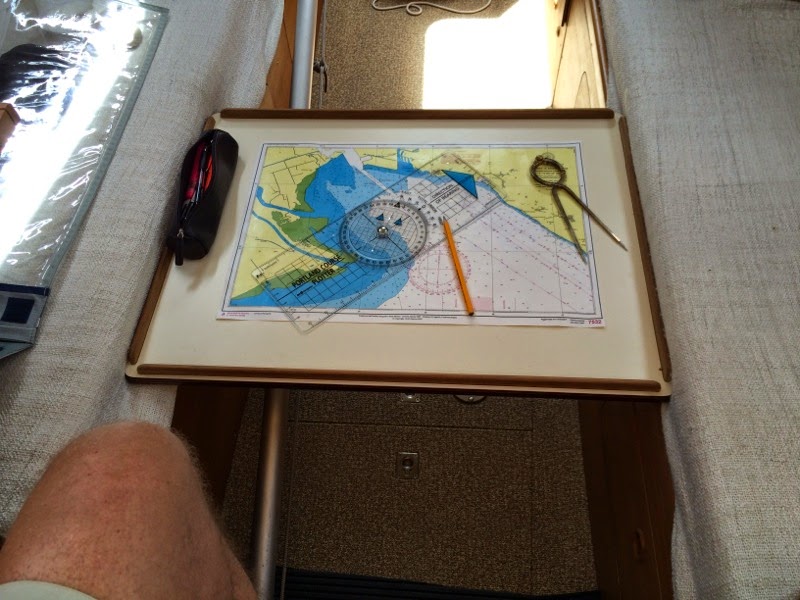
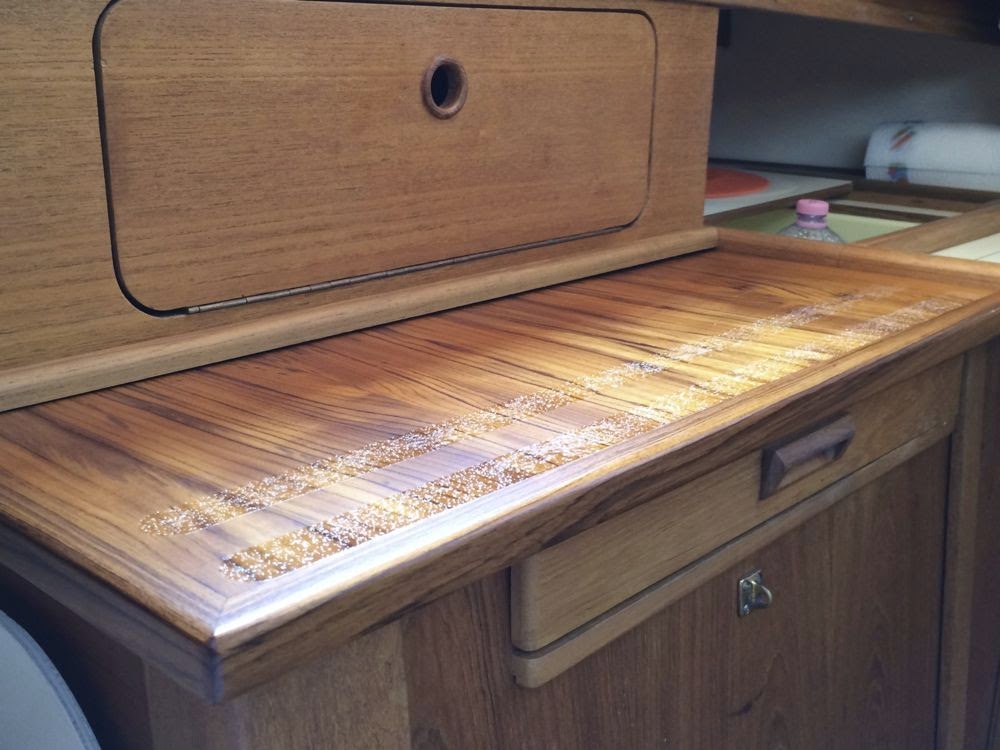
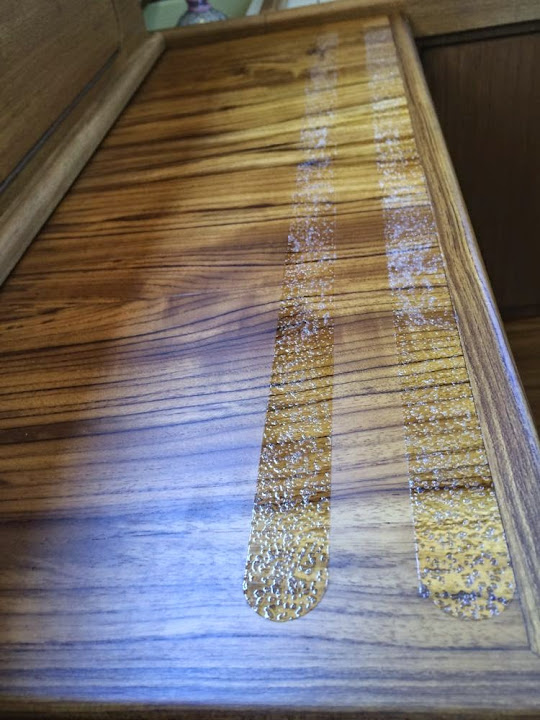
Il problema, se cosi si puo’ chiamare, è il tavolo da carteggio. non essendo previsto molti hanno cambiato il layout originale interno creandolo..io invece purista…ho deciso di mantenerlo! Ho solo costruito il tavolo da utilizzare come da foto. come utilizzo secondario ..un ottimo vassoio da pozzetto per servire le pietanze o giocare a carte ah ah ah ah!!!
Hello everyone!
despite having put on sale Dreamer the works inside continues, this in order to improve and optimize the space in this beautiful boat.
The problem, so if you can call, it is the chart table. not being provided many have changed the original layout inside creating it .. I rather purist … I decided to keep it! I just built the table to use as a photo. The a secondary use .. a great cockpit tray for serving food or play cards ha ha ha ha!
Oggi finalmente ho concluso i lavori interni.
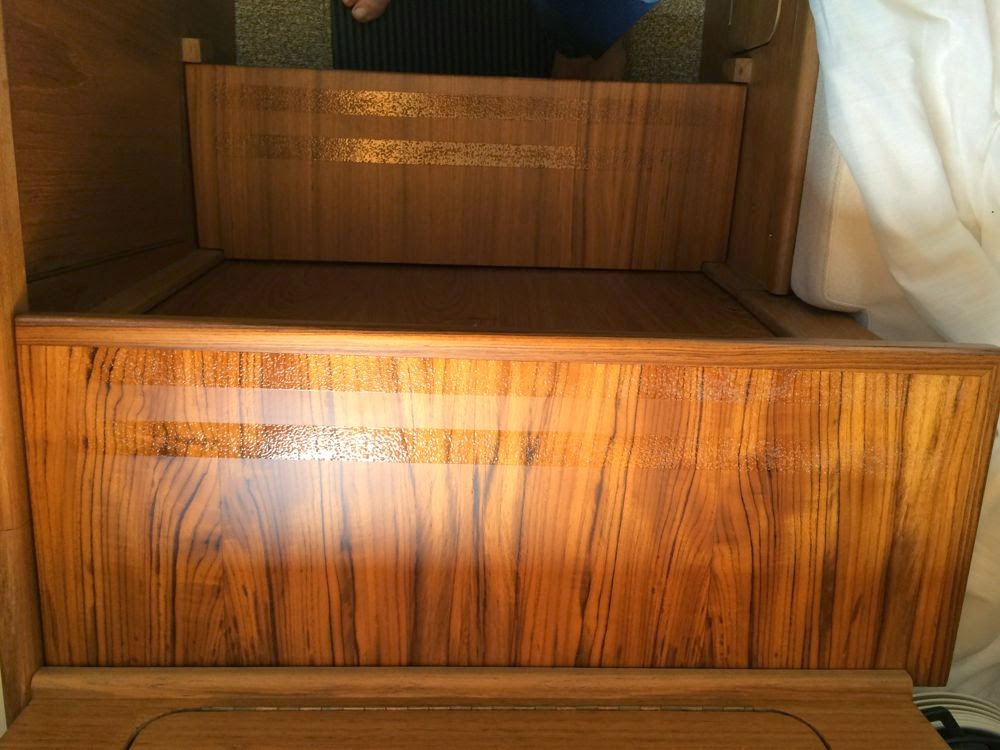
Dreamer ha nuovi scalini in Teak con relative strisce antisdrucciolo.
Io e Piero abbiamo costruito gli scalini in compensato marino incollando sopra con resina epossidica circa 5 mm di massello in teak . Successivamente sono stati verniciati con 4 mani di vernice Stoppani 910, carteggiati e infine verniciati a spruzzo con vernice Stoppani finitura satinata.Il giorno dopo con una maschera abbiamo creato le striscie antisdrucciolo combinando vernice e sabbia di vetro questo per evitare fastidiosi scivolamenti entrando in cabina.
Dimenticavo.. il primo scalino è stato ingrandito di circz 2 cm in lunghezza e studiato in modo che la testa in teak copra uniformemente il cassetto porta posate dando un senso di eleganza e pulizia.
Today I finally finished the interior work on Dreamer.
Me and Piero made the new teak’s steps with non-slip strips on. We did the steps in marine plywood glued with epoxy witht 5 mm solid teak, then coated with 4 coats of paint Stoppani 910, sanded and finally sprayed with a matte paint Stoppani coats .To make a no slip stripes we create a mask and after we spray Stopani coats and glass sand.
This is to prevent annoying slippage entering the cabin.
Forgot .. the first step has been made more bigger of 2 cm in length and designed so that the steps cover all and to create a nice cleaning looking.


ONE MORE……
Dreamer dopo la stagione estiva è ritornato alla base. Con un po’ di fantasia ho preparato i supporti per il cagnaro in modo da poter muovermi agilmente dentro il pozzetto e in modo da poter cambiare gli ombrinali evitando che la pioggia mi allaghi la sentina.
Vi lascio un po’ di foto…
Dreamer after the summer season he returned to the base. With a little fantasy I made the supports for the cover so I can move easily inside the cockpit and so I can change the scuppers avoiding me that the rain from flooding the bilge.
I leave you a bit of photos …


Ultime novita’? Molte! Ma ve le faro’ sapere nei prossimi post.
Quella che ora mi accingo a descrivervi si puo’ considerare forse il mio piu’ grande errore!
L’anno scorso nella foga del’creare qualcosa di unico mi sono concentrato nel costruire la cucina/lavandino e ghiacciaia di Dreamer in Corian. Il risultato eccellente,bello sia al tatto che alla vista ma…si e rivelato fallimentare in fatto di peso.
Il Corian utilizzato per fare il piano cucina/ghiacciaia/lavandino era da 12mm con un peso di 22kg al metro quadro e in Dreamer ne ho usato 2,38 MQ!!.. Totale: 40 kg sopra la linea di galleggiamento…. et voila’ barca leggermente inclinata..
Ho resistito un anno e dopo molti tentennamenti ho deciso…via tutto e rifare!!
Per cui con il mitico Piero al porto in soli 15 minuti abbiamo smontato cucina e ghiacciaia (conosco Dreamer come le mie tasche incluso il passo di ogni singola vite…).
Il nuovo progetto è già in corso e vi terrò informati con le varie foto del nuovo capolavoro con peso totale 12 KG!!! (Ghiacciaia fatta in carbonio…..eh eh eh!!)
Latest news’? Many in the next post … but what I am about to describe to you now is my my most big mistake .. and now I’ll explain.
Last year, in the boom of create something unique I focused in making the galley including icebox/sink etc made by Corian. The result was excellent and nice to the touch and look fabulous but.. it proved unsuccessful in terms of weight.
The 12mm Corian used weighs 22kg for meter square and I used 2.38 MQ to do it! .. total: 40 kg above the waterline …. et voila boat tilted slightly ..
I lasted one year, and after much hesitation I decided to re-make everything …!
So I went to the harbour with the legendary Piero and in 15 minutes we dismounted kitchen and icebox (I know Dreamer Like my pockets including the step of every single screw …).
The new project is already underway and will keep you informed with the various photos of the new masterpiece with total weight 12 KG! ( ..Icebox made by carbonfiber……. eh eh eh!)


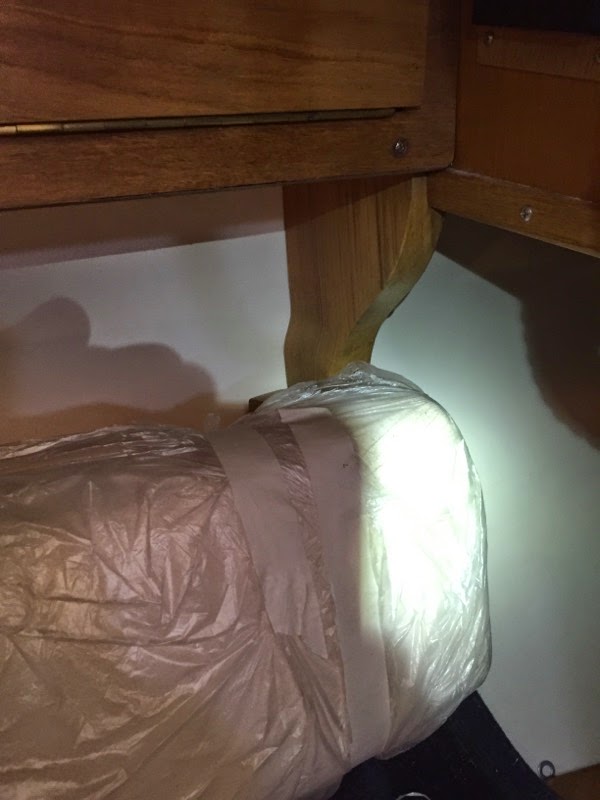
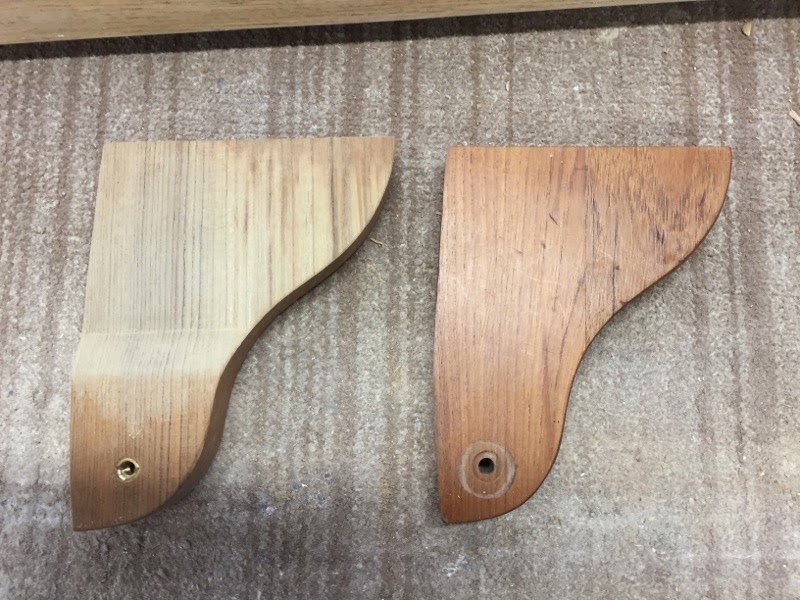
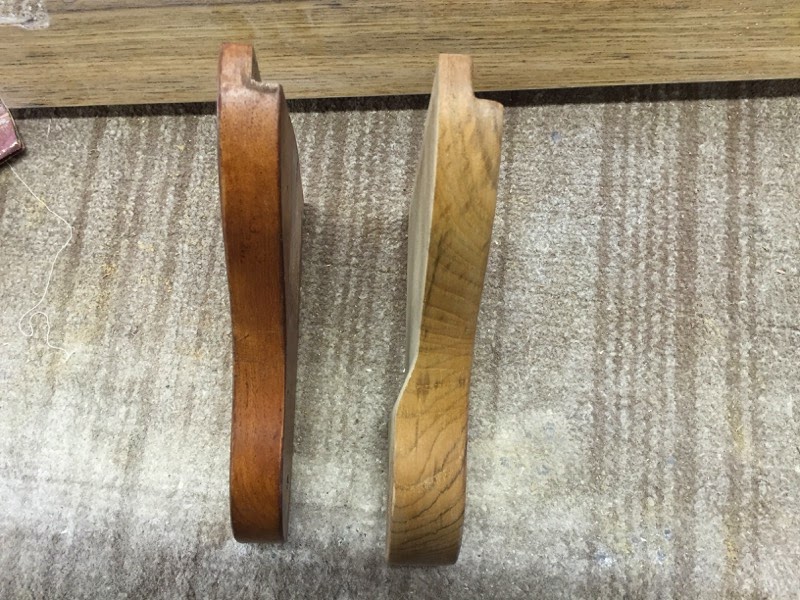
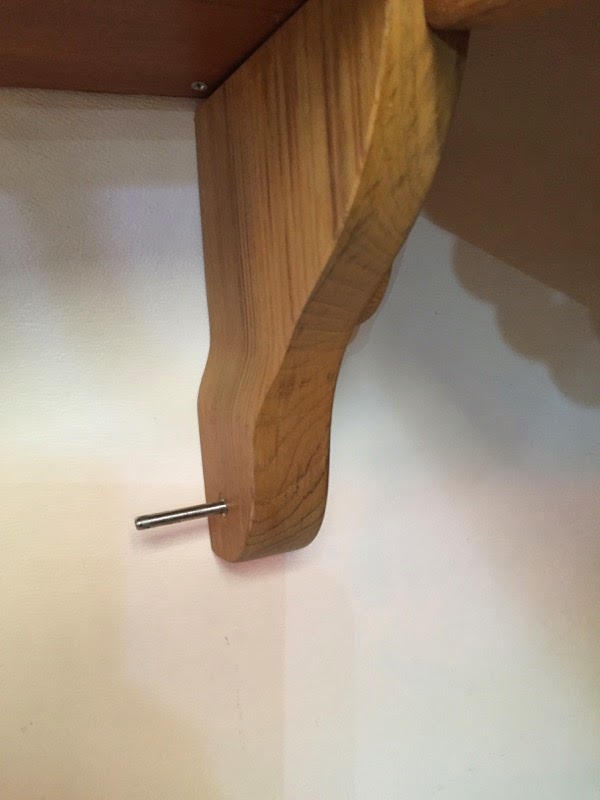
Visto il tempo che purtroppo non ci da tregua e nell’attesa di rimettere Dreamer in acqua, ho deciso di ri-smontare le corsie di teak dove scorrono le protezioni del tambucio e le maniglie. Con gli anni..circa 30..il teak delle corsie del tambucio si era ormai ridotto in maniera preoccupante non garantendo piu’ una sicura tenuta.
Grazie A Piero..il mio mentore in fatto di teak e lavori sul legno, abbiamo ricostruito i due pezzi, tali e quali, ma molto piu’ robusti e sopratutto piu’ affidabili.
Pensate che i tientibene erano inseriti nel Teak con e due “spine “di legno e un po’ di silicone…. ahi ahi ahi.
The weather unfortunately does not give us the sun and warm.. so waiting to put Dreamer in the water, I decided to disassemble teak lanesl where the washboards run included the handrails. Over the years .. about 30 .. the teak lanes of the companionway had been reduced at an alarming rate not more than ensuring safe washboard “keeping”..in bad weather.
Thanks to Piero .. my mentor guru of teak , we have reconstructed the two pieces, as they are, but much more strong and reliable.
Incredible… that the original handrails were attached to the Teak with “thorns” of wood and a little silicon …. ouch ouch ouch.Dangerousss!!!


Procedono i lavori di rifinitura interni e come al solito quando si cambia qualcosa, rimontando bisogna riadattare sempre tutto. Ormai sono abituato, e se prima mi spaventava ora con tranquillità risolvo senza problemi. Ben venga si dice… esperienza insegna! Dreamer aveva uno specchio incollato con bi-adesivo all’interno della porta del bagno, io ho conservato il tutto ma ho aggiunto una nuova cornice in teak ho inoltre sostituito il voltometro precedente con l’originale vecchio voltometro utilizzato dal vecchio proprietario Caspar, in quanto piu’ preciso nell’indicare lo stato di carica delle batterie.
A Voi le foto…:
Hello I’m finishing wood works inside Dremer, and as usual when you change something, you have to readjust and fix when reassembling everything. Now I’m expert! And if in the beginning I was scared about it, now with tranquility I solve everything with no problems.
Dreamer originally had a mirror glued with double-sided adhesive inside the door of the bathroom, now I have kept the whole thing but I’ve added a new frame in teak. I changed also the batteries control system, re-using the old voltmeter used by old owner Caspar, it is more precise in showing the battery status. Here the photos:

Old Mirror

New Teak Frame

“New” Voltometer
Salve a tutti,
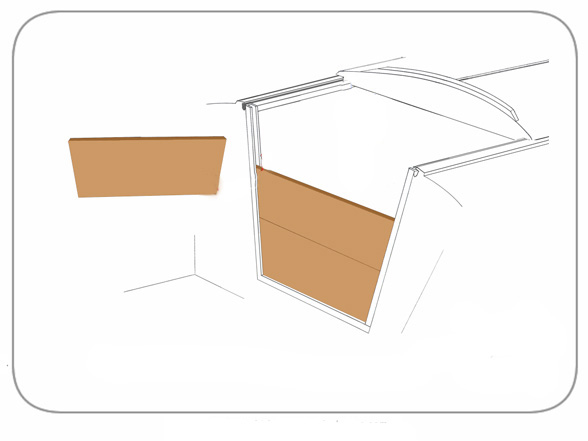
ringrazio tutti gli utenti che mi scrivono e mi incoraggiano ad andare avanti a questo progetto. Vi anticipo la modifica che ho fatto al mobilio della prua di Dreamer. E’ stato fatto per chiudere il foro di prua e rendere Dreamer piu’ bello e funzionale! Ciao
Hi all,
I thank all the people who write me and encourage me to move forward with this project.
I anticipate the changes I made to the furniture’s bow of Dreamer. It ‘been done to close the hole and make more beautiful and functional the Dreamer interior.
Cheers


